
Frying chicken at home can feel like a daunting task, but with the right approach, you can turn a few simple ingredients into a crispy, golden-brown masterpiece. Whether you’re cooking for your family or impressing guests, mastering the art of frying chicken is easier than you think. This comprehensive guide will walk you through every step to ensure your chicken is tender, flavorful, and perfectly crunchy every time.
The Origins of Fried Chicken
Fried chicken has a rich history that spans centuries and continents. Its roots can be traced back to Scottish and West African cooking traditions, which were brought together in the American South. Scottish settlers introduced the technique of frying chicken, while African cooks added bold spices and seasoning to create the flavorful dish we know today.
Over time, fried chicken became a cultural icon, symbolizing comfort and celebration. Today, it’s enjoyed in countless variations around the world, from classic Southern-style to spicy Korean fried chicken.
Essential Ingredients for Perfect Fried Chicken
The secret to irresistible fried chicken lies in using high-quality ingredients and balancing flavors. Here’s what you’ll need:
Ingredients (Table Format)
| Ingredient | Quantity | Notes |
|---|---|---|
| Chicken pieces | 6-8 | Bone-in pieces are best for flavor |
| Buttermilk | 2 cups | Helps tenderize the chicken |
| All-purpose flour | 2 cups | Forms the crispy coating |
| Cornstarch | 1/2 cup | Enhances crispiness |
| Paprika | 1 tsp | Adds smoky depth |
| Garlic powder | 1 tsp | Boosts savory flavor |
| Cayenne pepper | 1/2 tsp | Optional, for a spicy kick |
| Salt and pepper | To taste | Essential seasoning |
| Cooking oil | Enough for frying | Use neutral oil like canola or peanut oil |
These ingredients create a flavorful, golden crust while keeping the chicken juicy and tender inside.
Tools and Equipment You’ll Need
Before you start frying, make sure you have these essential tools:
- Deep, heavy-bottomed skillet or Dutch oven: Retains heat and prevents oil splatters.
- Meat thermometer: Ensures the chicken is cooked to the perfect internal temperature.
- Wire rack and baking sheet: Drains excess oil and keeps the crust crispy.
- Tongs: Safely handle hot chicken without damaging the crust.
Having the right tools will make the process safer and more efficient.
Step-by-Step Instructions for Frying Chicken
Frying chicken is all about preparation and timing. Follow these steps to achieve crispy perfection:
1. Prepare the Chicken
Start by marinating the chicken in buttermilk. This tenderizes the meat and infuses it with flavor. Ideally, let the chicken soak for 4-12 hours in the refrigerator.
After marinating, pat the chicken pieces dry with paper towels. This step is crucial to help the coating stick better.
2. Create the Coating
In a shallow dish, mix the all-purpose flour, cornstarch, and seasonings. The cornstarch adds extra crispiness to the coating.
Dredge each piece of chicken in the flour mixture, pressing firmly to ensure a thick, even coating. Let the coated chicken rest for 10 minutes before frying. This helps the crust adhere during cooking.
3. Heat the Oil
Pour enough oil into your skillet or Dutch oven to submerge the chicken halfway. Heat the oil to 350°F, using a thermometer to monitor the temperature. Maintaining a consistent oil temperature is key to achieving an even, golden crust.
4. Fry the Chicken
Carefully place the chicken into the hot oil, skin-side down. Fry in small batches to prevent overcrowding, which can lower the oil temperature and make the chicken greasy.
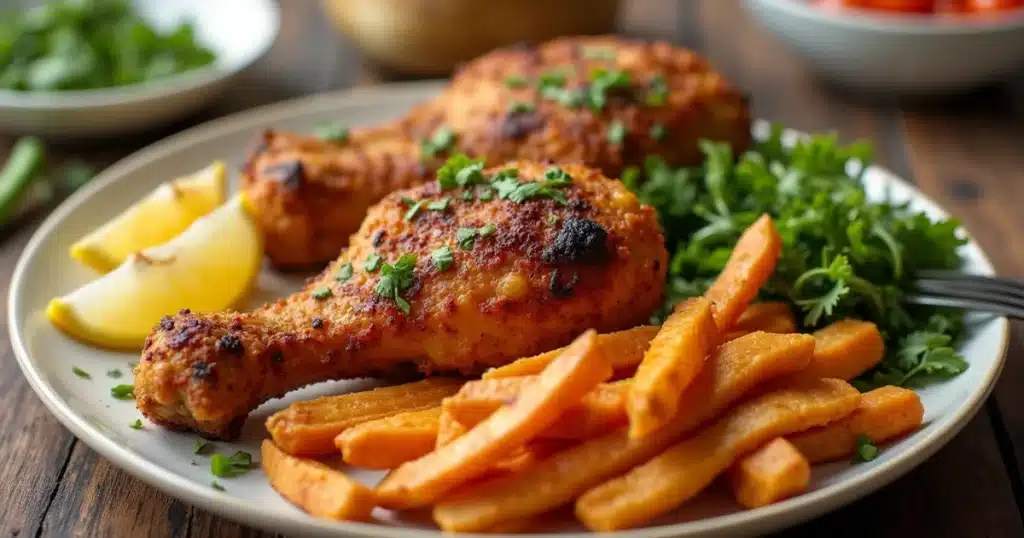
Cook each piece for 12-15 minutes, turning halfway through, until the chicken is golden brown and the internal temperature reaches 165°F.
5. Drain and Rest
Remove the chicken from the oil and place it on a wire rack set over a baking sheet. This allows excess oil to drip off and keeps the crust crispy. Let the chicken rest for 5 minutes before serving.
Tips for Beginners: Avoid Common Mistakes
- Don’t overcrowd the pan: Too many pieces at once can lower the oil temperature and result in soggy chicken.
- Use a thermometer: Consistent oil temperature and cooked chicken are non-negotiable.
- Let the coating rest: Allowing the chicken to sit after dredging helps the coating adhere better.
- Season generously: A bland crust will ruin even the best-cooked chicken.
Storing and Reheating Fried Chicken
Fried chicken is best enjoyed fresh, but it can be stored and reheated while retaining its crispiness.
- Storing: Place leftover chicken in an airtight container and refrigerate for up to 3 days.
- Reheating: Preheat your oven to 375°F. Place the chicken on a wire rack over a baking sheet and heat for 10-15 minutes. This method restores the crispy texture without drying out the meat.
Frequently Asked Questions (FAQ)
How do I keep my fried chicken crispy?
Drain the chicken on a wire rack instead of paper towels to prevent steam from softening the crust.
Can I fry boneless chicken?
Absolutely! Just adjust the cooking time since boneless pieces cook faster.
What’s the best oil for frying chicken?
Neutral oils like canola, vegetable, or peanut oil work best due to their high smoke points and light flavor.
Why does my coating fall off?
Coating may fall off if the chicken is too wet or if the oil temperature is too low. Pat the chicken dry and maintain consistent heat for better results.
Nutrition Information (Per Serving)
| Nutrient | Amount |
|---|---|
| Calories | 350 kcal |
| Protein | 25 g |
| Fat | 18 g |
| Carbohydrates | 22 g |
| Sodium | 450 mg |
Similar Recipes You’ll Love
If you loved this recipe, try these:
- Crispy Oven-Baked Chicken: A healthier, no-fry alternative.
- Spicy Korean Fried Chicken: Sweet, spicy, and utterly addictive.
- Buttermilk Chicken Tenders: Perfect for kids and easy to make.
Conclusion
Frying chicken to perfection is a skill worth mastering. With this guide, you’ll not only achieve crispy, juicy results every time but also understand the techniques behind this iconic dish. Whether you’re cooking for a special occasion or a casual family dinner, perfectly fried chicken is always a crowd-pleaser.
Ready to Try It?
Click below to Print the Recipe as a PDF and start frying! Don’t forget to share your results and tips in the comments.
Cooking is an adventure, and perfecting your fried chicken recipe is just the beginning. Happy frying! 😊
Share Your Experience
There are no reviews yet. Be the first one to write one.


One Comment
Comments are closed.